A few friends of mine have recently motivated me to spend a while on documenting my experiences with monitoring particulate matter. I live in Gliwice currently, and I’m lucky enough to have an “official” monitoring station 500 m from my apartment. The latest measurement shows PM 2.5 concentration of 644 µg/m³ at noon, and it’s way above the limits established by the EU or WHO.
This is a huge issue in my region, but lots of towns around don’t measure the air quality at all. If you are concerned about it, and you don’t want to rely on measurements from 50 km away, there’s one solution - you can launch your own monitoring station at home.
Hardware
The core of the device is a particle sensor. You can find an extensive list of different sensors on aqicn.org. Most of them cost around $20, contain a laser diode and a small fan. I checked what’s available in local shops and in China, and I came to a conclusion that the Novafitness SDS011 is the most reasonable option for me. It’s popular, pretty accurate (according to aqicn.org), and costs around $22 on Aliexpress. It can be powered out of a standard USB port, it has an analog and a digital (serial) interface - which makes using it very straightforward.
I connected the sensor to a Raspberry Pi, but I quickly realized that it’s an overkill - it’s very expensive and too complex to set up. I also considered using Arduino or C.H.I.P., but for this use case I found one MCU that beats everything else: ESP8266. Apart from stuff like GPIO or ADC, it has a serial port, built-in WiFi, can be programmed in Lua and costs below $2. It comes in different forms, you can buy a bare MCU or a complete development board with a USB interface. There’s also a Wemos D1 mini development board, that seems to fit our needs pretty well. It costs around $3 and provides a micro USB socket for powering and programming the device.
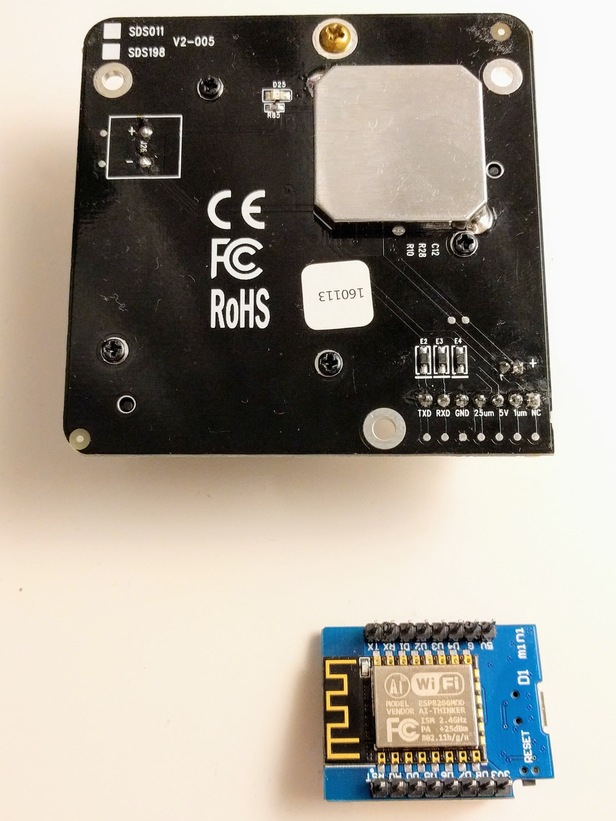
You need to connect these two pieces together as follows:
- 5V (SDS011) to 5V (D1)
- GND (SDS011) to G (D1)
- TXD (SDS011) to RX (D1)
- RXD (SDS011) to TX (D1) - this line is never used actually
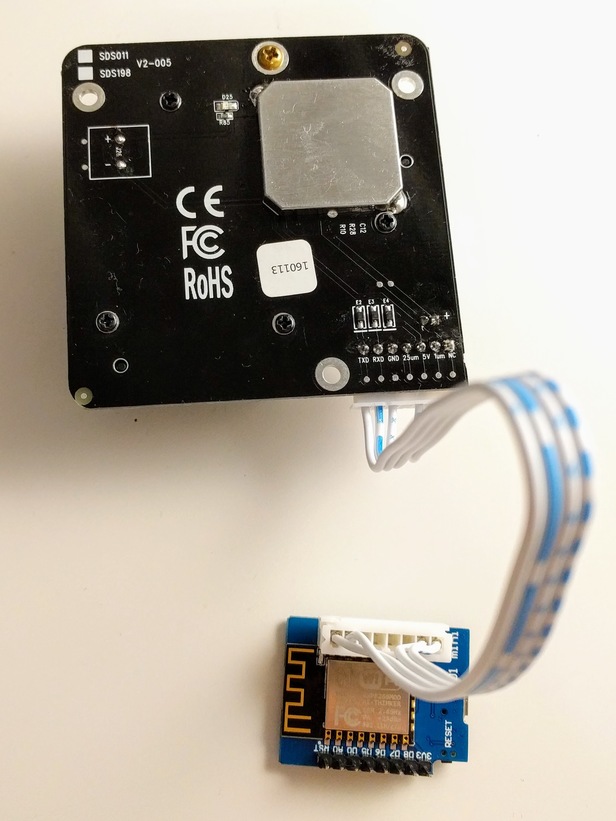
It can be done with the original cable that SDS011 comes with. Unfortunately, the original cable is equipped with a 5-pin JST-XH header, which needs to be replaced with an 8-pin one. These plugs are very popular nowadays - they’re used in RC toys’ batteries for balancing. Check your local RC hobby stores or Aliexpress and you’ll find one. The complete device should look like this:
Software
I’ve decided to program the device using Lua because I already had a working Ruby code for decoding measurements from the SDS011 sensor (on Raspberry Pi). It needed just a few simple substitutions (like operators and standard library function calls) to make it valid Lua code. In order to run Lua on ESP8266, you need to flash the firmware with the latest NodeMCU, using a standard USB cable and esptool. NodeMCU documentation contains all necessary information on flashing ESPs. You can get the latest firmware using their build tool, just ensure that it contains the following modules:
- file (for programming)
- GPIO (for controlling the LED)
- HTTP (for reporting the measurements to an external service)
- struct (for decoding SDS011 messages)
- UART (for communicating with SDS011)
- WiFi (to be able to use wireless connection)
- end user setup (to avoid hard coding WiFi credentials)
- SSL support (for HTTPS)
After flashing the firmware, it’s necessary to upload the Lua code to the Wemos D1:
luatool.py --port /dev/ttyUSB0 --src init.lua --dest init.lua
Data visualization and storage
After playing with Firebase for a while, I found a simpler solution: Dweet.io. You don’t need to create any accounts, generate access tokens to use it - it’s just a matter of publishing and subscribing to a specific channel identified by its name (which I generate automatically using the ESP8266 ID to avoid collisions). Dweet’s data visualization is ridiculously simple - they provide another tool called Freeboard that allows you to create a nicely looking dashboard for your sensor. It could look like this. They’ve also an option to store your measurements for 30 days (it costs $2 per month) if you need.
Wrapping up
The whole device costs less than $30, it’s functional and contains only off-the-shelf parts - there’s no need for soldering. It can be powered straight from a USB port, as well as from any USB charger or a powerbank. Overall power consumption should be lower than 0.5 W. It’s also highly customizable - you can change it to report the measurements to your local MQTT server, connect additional temperature, wind, humidity sensors, and so on. It should be also fairly easy to optimize it for battery: using deep sleep mode and by turning the sensor off during the sleep.