If you happen to break your MK42 heatbed, like I did a week ago, there’s a non-obvious way of getting it back to life. I accidentally cut the PEI layer and damaged one of the heating circuits in the middle of the PCB, when using a very sharp tool to peel the print off the bed. Even though there’s more than one circuit on the board, breaking just one of them means that your heatbed won’t have enough power and won’t heat up evenly - becoming virtually useless. I’ve decided to order a new heatbed for $100 from Prusa Research to make the printer functional as quickly as possible. However, I really don’t like throwing things in the garbage, so I started looking for a way to fix the old heatbed.
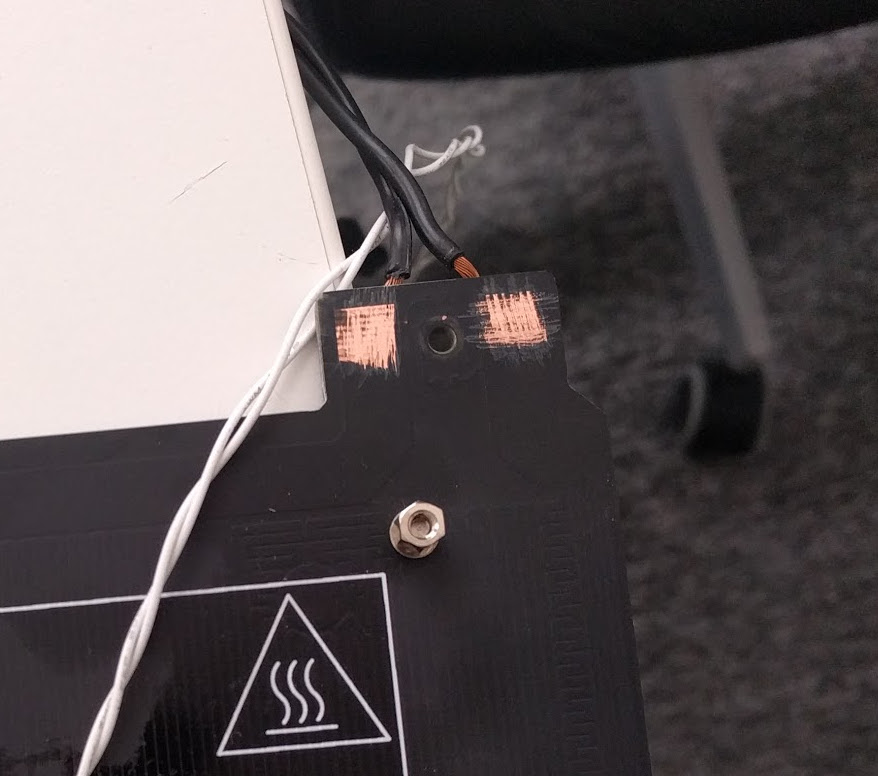
If you take a look at the bottom side of the heatbed, you’ll notice that it has a complete heating circuit, identical to the one on the top side. It’s just covered by a solder mask, which you can easily scrape off. Everything you need is a sharp knife (I happened to use the same one that I used to damage the top surface) and a soldering iron. Carefully scrape off the solder mask from the heating circuit contacts until you get a nice copper surface that you can use for soldering the wires.
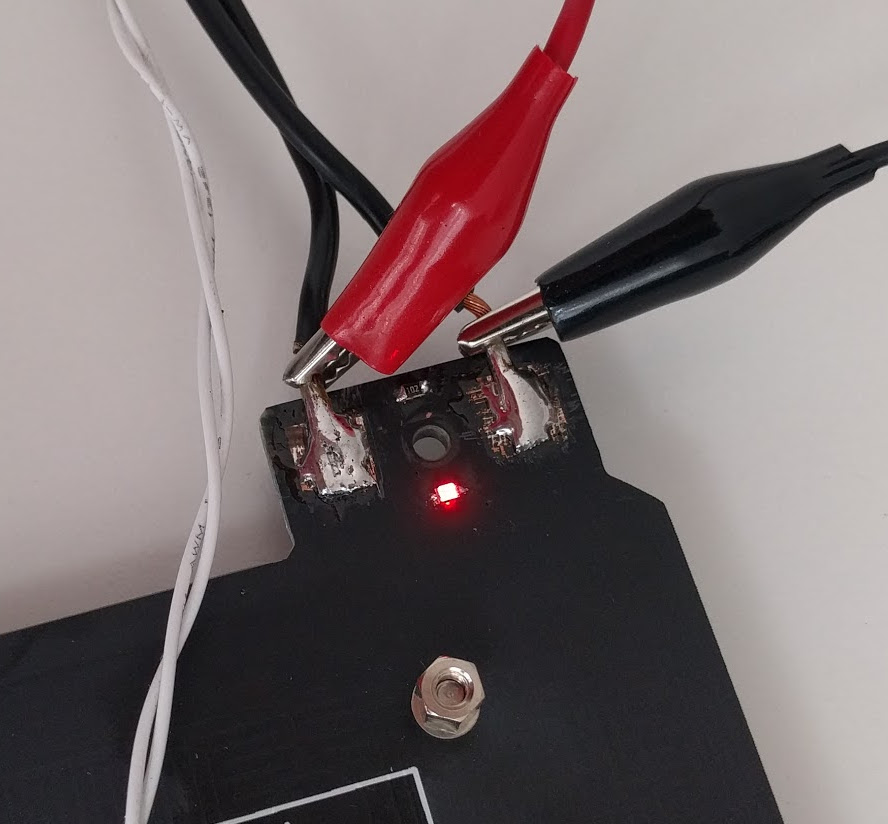
I also soldered the LED and the 1 kΩ resistor to make it fully functional. You can verify that the circuit works properly by applying 12 V to the contacts and waiting until it heats up.
This approach allows you to reduce the cost of repairing the heatbed from $100 to $16 - a cost of a new PEI sheet. The only drawback of using the bottom circuit to heat the bed up is that you may need to increase the temperature by a few degrees to make it as hot as previously on the other side of the heatbed because the thermistor will turn the circuit off a little bit earlier than before.